
Brad-point drill bits are the gold standard for boring clean holes in wood, but their efficiency relies entirely on the precise geometry of their tips. Even minor deviations in lip height or spur angle can lead to massive tearout. Let’s analyze how this geometry works and how you can tune it at the bench.
The Anatomy of a Brad-Point
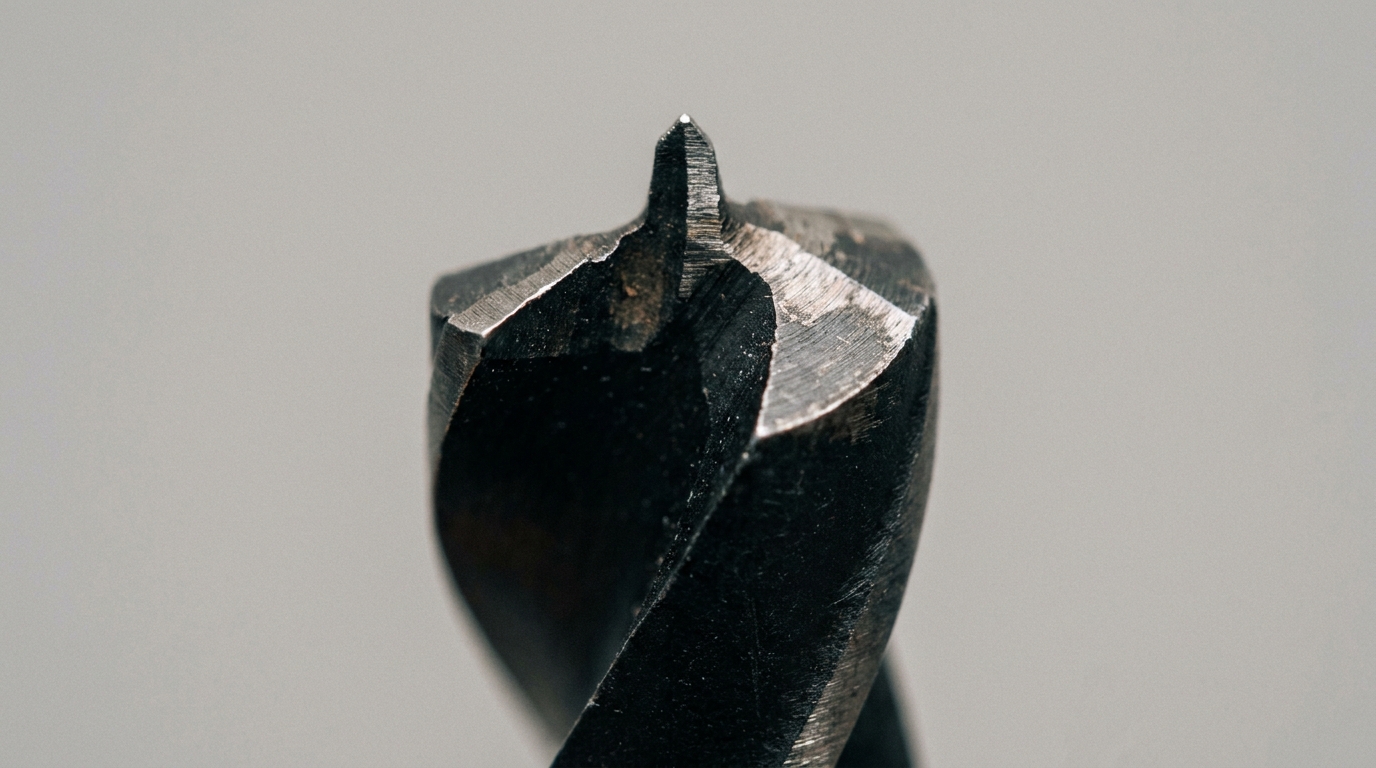
A brad-point bit consists of three key components:
- The Center Spur (Brad): Guides the bit. It must be longer than the outer lips so that it registers in the wood before the cutting edge begins to engage.
- The Outer Lips (Spurs): Score the outer circle. They act like tiny knives slicing the wood fibers.
- The Flutes: Spiral channels designed to lift chips out of the hole.
The Cause of Tearout
Tearout occurs when the outer lips fail to score the fibers before the main cutting edge starts lifting material. This happens when the center spur is worn down, or if the bit has been sharpened incorrectly, leaving the lips lower than the main cutting bevels.
How to Hand-Tune a Brad-Point
You can tune a dull brad-point using a small diamond needle file. Secure the bit in a bench vise. Carefully file the inside face of the outer spurs. Never file the outside diameter, as this will reduce the cutting diameter and cause the bit to bind in the hole. Keep the file flat against the original factory angle, making sure to maintain equal height on both spurs.
Video Guide: Brad Point Drill Bits – Tips & Tuning
For more about drill bits, see Drill Bits for Furniture Makers: Every Type Explained. To see how brad-points are used for dowel joinery, refer to our Wood Joinery: Which Joint, When, and Why guide.
Purchase premium needle files for tool tuning at Highland Woodworking.
Have questions or feedback about this guide? Get in touch with our editorial team on our Contact Us page.